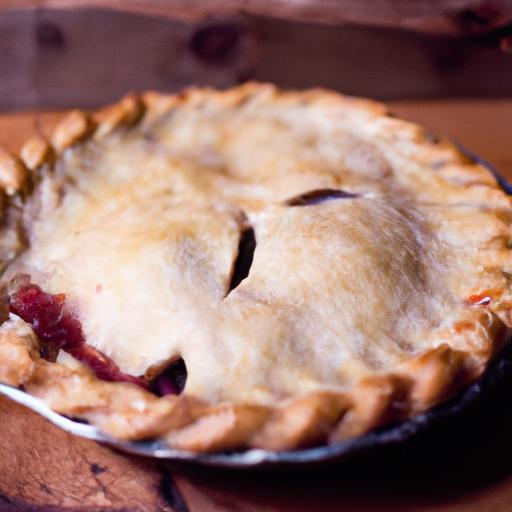
There’s a certain magic in the flaky, buttery embrace of a perfect cherry pie crust-a delicate dance of chemistry and craftsmanship that transforms simple ingredients into a golden, tender masterpiece. Behind each crisp edge and melt-in-your-mouth crumb lies “the sweet science,” a fascinating blend of artful technique and precise science. From the delicate balance of flour and fat to the chilling temperature that shapes texture, this is more then just baking; it’s an edible experiment where physics meets flavour. Join us as we uncover the secrets and science that make the perfect cherry pie crust not just a appetizing treat,but a testament to the beauty of baking’s hidden formulas.
Understanding the subtle interplay between flour, fat, hydration, and temperature is essential to crafting a pie crust that is both flaky and tender. Choosing the right flour sets the foundation: all-purpose flour strikes a stunning balance, providing enough gluten for structure without making the crust tough. For an even more delicate texture, a blend incorporating cake flour can soften the crumb further.This thoughtful selection shapes the very first layer of your pie’s allure.
The Role of Fat in Achieving the Ideal Texture and Flavor
Fat is the magic ingredient that transforms dry flour into a dreamy crust. Using cold,solid fats-like unsalted butter or chilled shortening-intersperses tiny pockets of fat within the dough. During baking, these pockets melt and release steam, creating flaky layers that practically melt on your tongue. Butter brings superior flavor and a golden hue, while shortening contributes extraordinary tenderness. Many bakers find that a combination of both offers the best of both worlds: brilliant texture paired with rich, buttery taste.
Mastering the Art of Dough Hydration and Temperature Control
Hydration is a delicate balance. Over-hydrated dough becomes sticky and tough,while under-hydrated dough lacks cohesion,cracking on the roll. Start by adding ice-cold water a tablespoon at a time, mixing just until the dough holds together. Keep everything chilled; working quickly and keeping your tools and workspace cool prevents the fat from melting prematurely, which can cause a greasy crust. Resting your dough in the fridge relaxes gluten strands and keeps the fat firm, ensuring a tender, flaky bite.
Tips for Rolling and Baking to Seal in Sweet Cherry Goodness
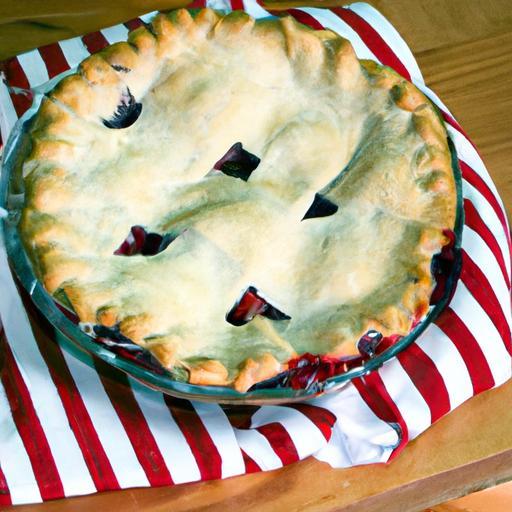
Rolling your dough evenly to about 1/8 inch thickness ensures both sturdiness and a delicate crisp. Use a light dusting of flour to avoid sticking, but not so much that it dries the dough out. When covering your luscious cherry filling, gently lift the dough into place to prevent tearing, then crimp edges tightly to seal juices inside. For a perfectly browned crust with a shimmer of glossy finish, brush the top with an egg wash before baking. Bake on a lower rack to help the bottom crust crisp beautifully without burning the fruit filling.
Prep and Cook Time
- Preparation: 40 minutes (including chilling)
- Cooking: 50 minutes
- total: 1 hour 30 minutes
Yield
- Serves 8 slices
Difficulty Level
- Medium
Ingredients
- 2 ½ cups all-purpose flour, sifted, plus extra for dusting
- ½ cup cold unsalted butter, cut into small cubes
- ½ cup chilled vegetable shortening
- 1 teaspoon fine sea salt
- 4 to 6 tablespoons ice-cold water
- 1 large egg, beaten (for egg wash)
- 5 cups fresh or frozen pitted sweet cherries
- ¾ cup granulated sugar
- 3 tablespoons cornstarch
- 1 tablespoon freshly squeezed lemon juice
- 1 teaspoon vanilla extract
- Pinch of ground cinnamon
Instructions
- Prepare the crust: In a large bowl, combine all-purpose flour and sea salt. Add the cold butter and shortening cubes. Using a pastry cutter or your fingers, quickly cut the fats into the flour until mixture resembles coarse crumbs with pea-sized pieces.
- Hydrate: Drizzle 4 tablespoons of ice-cold water over the mixture. Gently fold and press until dough starts to cling together. Add remaining water by tablespoons only if needed-avoid overmixing to keep dough tender.
- Form and chill: Divide dough into two equal disks,flatten slightly,wrap in plastic,and refrigerate for at least 30 minutes. This rest period lets the gluten relax and fats firm up.
- Make the cherry filling: In a mixing bowl, toss cherries with sugar, cornstarch, lemon juice, vanilla, and cinnamon until well coated. Set aside to macerate.
- Roll out dough: On a lightly floured surface, roll one disk into a 12-inch circle about 1/8 inch thick. Transfer to a 9-inch pie dish,gently pressing to fit but avoiding stretching.
- Fill and cover: Pour cherry filling into the crust. Roll out the second disk into a similar circle and cover your pie. Trim edges with a sharp knife, fold bottom dough edges over the top, and crimp tightly to seal.
- Egg wash and vent: Brush the top crust with beaten egg. Cut decorative slits or small shapes in the crust to allow steam to escape.
- Bake: Place pie on the lower rack of a preheated 375°F (190°C) oven. Bake for 20 minutes, then reduce heat to 350°F (175°C) and bake an additional 30 minutes or until crust is golden and filling bubbles.
- Cool: Allow pie to cool for at least 2 hours for filling to set and flavors to meld beautifully.
Tips for Success
- use a pastry blender or food processor to keep fats cold and uniform-warm hands can melt butter too fast, affecting flakiness.
- Don’t overwork the dough. Handle as little as possible to prevent gluten from toughening the crust.
- For a visually stunning crust, try lattice or decorative cutouts. Chill the pie for 15 minutes before baking if making intricate designs.
- To avoid soggy bottoms, bake your pie on a preheated baking sheet. This heat boost crisps the underside perfectly.
- Make ahead: Pie dough can be refrigerated up to 2 days or frozen up to a month-just thaw overnight in the fridge before using.
Serving Suggestions
Serve slices warm or at room temperature with a scoop of vanilla bean ice cream or a dollop of fresh whipped cream. Garnish with a sprinkle of toasted almond slices or a fresh mint leaf to elevate the visual appeal and texture contrast. A light dusting of powdered sugar over the cooled crust adds a delicate sweetness and charming finish that complements the tart cherry filling.

| Nutrient | Per Serving |
|---|---|
| Calories | 350 kcal |
| Protein | 4 g |
| Carbohydrates | 50 g |
| Fat | 15 g |
For further inspiration on creating perfect pies, explore our Ultimate Guide to Pie Crusts. Learn more about the science behind flour and fat balance from trusted food science sources like Cook’s Illustrated.
Q&A
Q&A: The Sweet Science Behind the Perfect Cherry Pie Crust
Q1: Why is the crust just as crucial as the cherry filling?
A1: Think of your cherry pie as a duet-while the filling sings with vibrant, tart-sweet notes, the crust provides the crunchy harmony that holds everything together. A perfect crust balances texture and flavor, offering a buttery, flaky contrast to the juicy cherries, making every bite a symphony of taste and mouthfeel.
Q2: What makes a pie crust flaky instead of tough or chewy?
A2: The secret lies in the butter-or sometimes shortening-and how it’s treated. Fat pieces create tiny steam pockets as they melt during baking,flaking the dough apart. Overworking the dough melts the fat prematurely or develops too much gluten in the flour, resulting in toughness. Chill your dough, handle it gently, and embrace a little imperfection for that flaky magic.
Q3: How does temperature impact the crust’s texture?
A3: Temperature is a crust’s best friend. Cold ingredients ensure the fat stays solid until it hits the oven, encouraging flakiness. Warm ingredients cause fat to blend too thoroughly, leading to a dense crust. Even your water should be ice-cold, and chilling the dough before rolling solidifies the structure for that golden finish.
Q4: What role does sugar play in the crust?
A4: sugar isn’t just about sweetness. It tenderizes the dough by competing with flour for moisture and helps with browning via caramelization. In the case of cherry pie, a touch of sugar in the crust adds subtle crunch and depth, complementing the filling’s tartness.
Q5: Is it better to blind-bake the crust for cherry pie?
A5: Cherry filling is juicy,so blind-baking-or pre-baking-the crust can prevent sogginess by setting the base before adding the filling. A light brush of egg wash or sprinkling of flour or crushed nuts before blind baking helps create a moisture barrier. However,some bakers prefer partially baking or going straight to baking after assembling to keep a tender edge. Experimentation is key!
Q6: How can I prevent my crust edges from burning while the filling bubbles?
A6: Cherry filling can bubble over and cause edges to brown too quickly. Shield your pie’s edges with a foil ring or a pie crust shield for the first 20-30 minutes of baking, then uncover to achieve an even golden hue. This thoughtful tenting ensures the crust edge remains perfectly baked, not burnt.
Q7: Are there option fats to butter for a delicious cherry pie crust?
A7: Absolutely! While butter offers rich flavor, combining it with shortening or lard can enhance flakiness. Shortening has a higher melting point,helping crusts hold shape,while lard lends incredible tenderness. Some adventurous bakers even experiment with coconut oil for a subtle exotic twist. the choice shapes the texture and flavor, so feel free to tailor your crust soulmate.
Q8: What’s the science behind using vinegar or vodka in pie dough?
A8: Adding a splash of vinegar or vodka is a clever trick to toughen the dough less. Vinegar slightly weakens gluten strands, preventing overdevelopment without compromising structure. Vodka, being alcohol, doesn’t activate gluten and adds moisture without making the dough sticky.These ingredients result in an ultra-tender crust that holds its shape beautifully.
Q9: How do I no when my cherry pie crust is perfectly baked?
A9: Look for a golden-brown crust with slightly darker edges and bubbling, thickened cherry filling. The crust should feel firm but still delicate to the touch. If the filling bubbles too vigorously, you might need to lower the oven slightly next time to get that perfect bake without a burnt crust.
Q10: Can I mix different flours to improve my pie crust?
A10: Yes! Using a combination like all-purpose and pastry flour can offer the ideal balance between strength and tenderness. Pastry flour has less protein, creating a softer crust, while all-purpose helps hold things together. Some bakers even add a touch of almond flour for a nutty flavor and tender crumb-perfect for complementing cherries’ bright flavor.
Unlocking the sweet science of cherry pie crust turns a simple dessert into a masterpiece. With understanding and a dash of creativity,your next pie can captivate the table with every flaky,buttery bite. Happy baking!
Concluding Remarks
As the warm aroma of a freshly baked cherry pie fills your kitchen, remember that behind every flaky, golden crust lies a delicate dance of science and art. From the precise balance of fats to the chill that keeps gluten at bay, each step is a small experiment yielding delicious results. So next time you roll out your dough, you’re not just baking-you’re engaging in a centuries-old craft where chemistry meets creativity. Embrace the sweet science, and your perfect cherry pie crust will be more than a recipe; it will be your masterpiece.